More than a couple people have asked about my digital framing technique. I didn't invent it, someone shared it with me years ago, so I will share it with those that would like to know. It's pretty simple and really takes just a couple of minutes.
1. Open your image in Photoshop and resize it to 72 dpi and about 500 pixels across. Always resize any image you post on the web to 72dpi. If someone is desperate enough to appropriate your work as their own, there isn't much they can do with it except repost it on the web....72 dpi is useless for printing.
So now you have this:
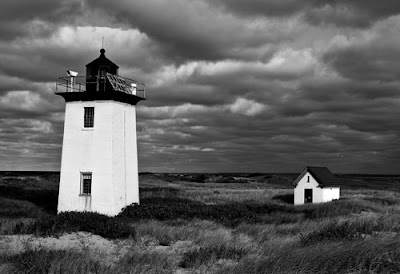
2. Display the image at actual size in your window...
Change your background color to 204, 204, 204
Go to Image>Canvas Size
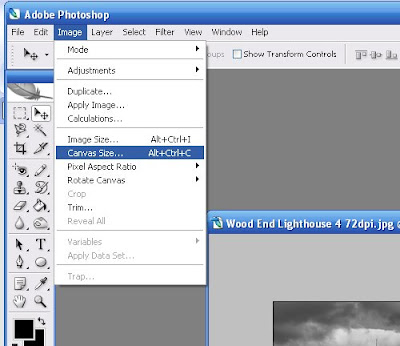
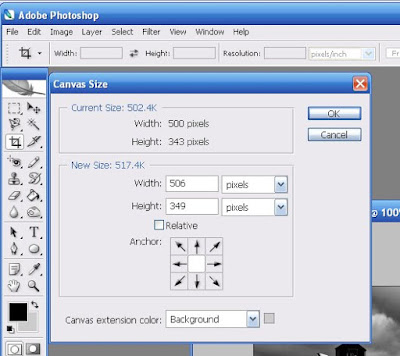
Change your view to pixels instead of inches and add 6 pixels to both the height and the width...
Now you have this:
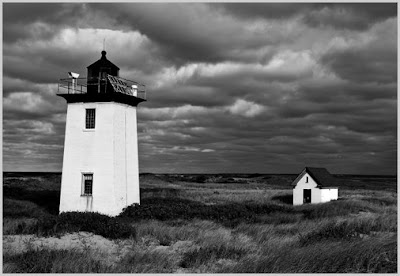
That gray line will appear as the bevel cut in your matte.
Now change your background color to white..again go to Image>Canvas Size and add pixels that equal about 40% of the longest dimension of your image...this image is 500 pixels wide,
40% would be 200, but I'm going to go
180. Then change the background color to black and again go to Image>Canvas Size and add 60 pixels to both the width and the height.
Now you should have this:
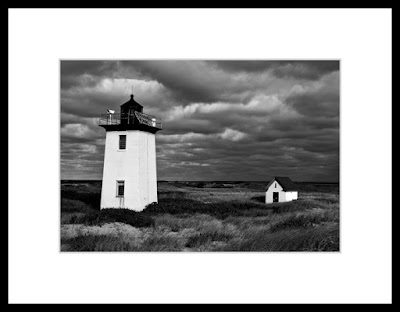
Now for the tricky part...
Go to Select>All (a dashed line should appear around the entire frame)
Go to Edit>Copy (everything withing the dashed line should copy to the clipboard)
Go to File>New and open a new white sheet that is larger than the copied image and frame
Make sure the new sheet is active and go to Edit>Paste and the copied image should appear right in the middle.
Now, you should have this:
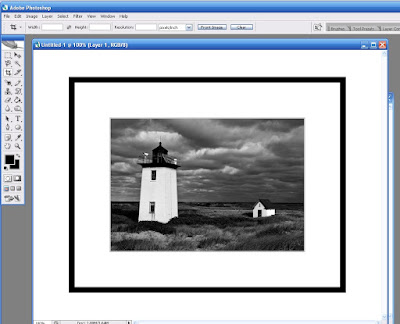
Now close the original you were working on and just keep this new one open.
Time to do the drop shadow.
Now go to Layer>Layer Style>Drop Shadow:
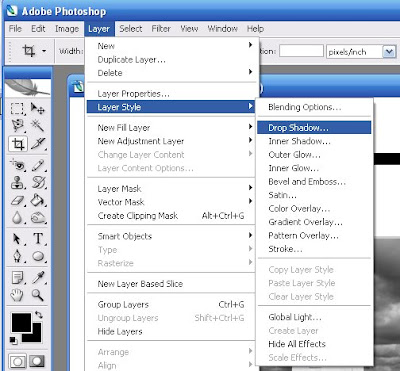
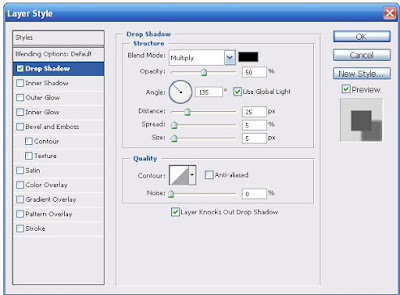
These are the settings I use....Experiment to find what you like...
Now you should have this:
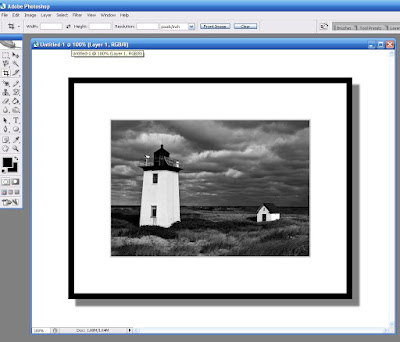
Now go to Layer>Layer Style>Bevel and Emboss
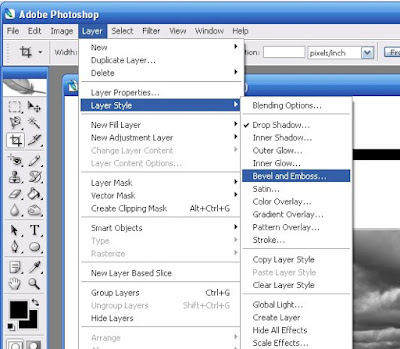
These are the settings I use here:
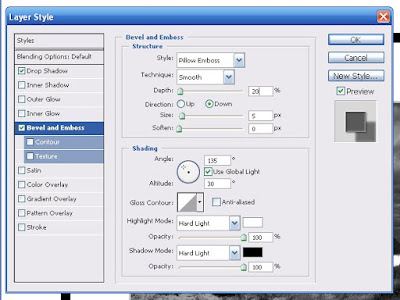
Almost done now.....
Go to Layer>Flatten Image
Crop it to your desired amount of
background and save it. Now you should be left with this:
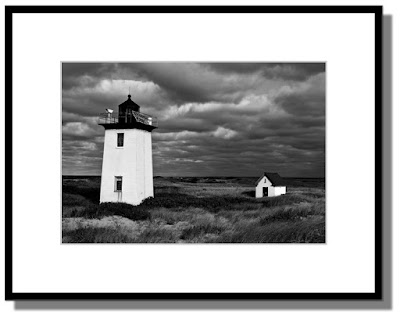
Done. I'm sure there are a lot of other techniques for this and similar things, but this is how I do mine. I hope this helps those who asked and maybe some others as well.

 Scott Bulger Display
 The owner of this gallery, Ana Gourlay, has done a beautiful job with this space, and even though there were many photographers in this show, each one had their own very distinct style, so a tremendous variety of work was available for viewing.


